8 EASY YOGA POSES TO HELP RELIEVE SCIATICA AND LOWER BACK PAIN IN 30 MINUTES

Due to the various factors, such as improper sitting, overall gene factor and the stressful lifestyle sciatica pain is one of the most common conditions of the day.
For everyone who suffers from sciatica, it is important to know the reason why it occurs and what are the symptoms. Sciatica can occur in all people, no matter of sex or the ages. The pain caused by sciatica can be chronic and could cause severe problems.
Sciatica Pain Causes
Related to the sciatic nerve, the spine curve is the main starting point of all pain, which is known as a herniated disc. When the pain in this area occurs it is a sign to ask for immediate doctor’s attention.
The number of people who suffer sciatica nerve problems caused by piriformis syndrome is around 70% of all cases. It means that a tiny muscle located deep in the buttock instantly affects the sciatic nerve in case of strains, spasms, swelling and injury.
Look at the main symptoms of inflamed sciatic nerve:
Pain in areas close to the sciatic (lower back, back of the thigh, buttock, and/or calf)
Tingling, numbness, fatigue, or loss of feeling in lower limbs
Knees weakness when standing up
An electric, pinching, burning, or pins-and-needles feeling in the same area
Weak reflexes in the knee and Achilles tendon
Foot drop – inability to flex your ankles enough to walk on your heels.
One of the best ways to relieve sciatica and lower back pain is the treatment with the specific yoga poses.
In this article, we will represent you 8 Yoga Poses for Sciatica Pain
Yoga is a special discipline of tightening and stretching the body, which helps to keep it safe from harm and exposed to fewer injuries. To go more specific, many people practice yoga as it can also help amazingly in treating sciatic nerve pain.
Follow the instructions of the next top 8 yoga poses that will help you relieve sciatic nerve pain:
1. The Standing Back Twist
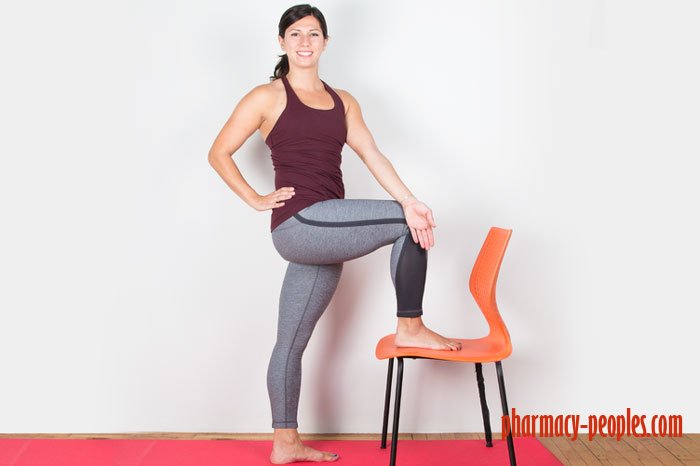
Instructions:
– Starting position – Place your right foot up on a chair and keep the back of your opposite hand on the knee. Put the other hand on your hip.
– Turn your body by staying firm in the hips, holding the posture for thirty seconds.
– Switch the sides and repeat
Note – make sure not to push it if there’s a pain.
2. The Knee Raise
Instructions:
– Starting position – flat on your back with one knee raised to your chest, while the other leg is straight extended and the shoulders glued to the
floor
– Holding the raised leg under your knee pull it closer to your chest.
– Switch the sides and repeat
3. The Two Knee Twist
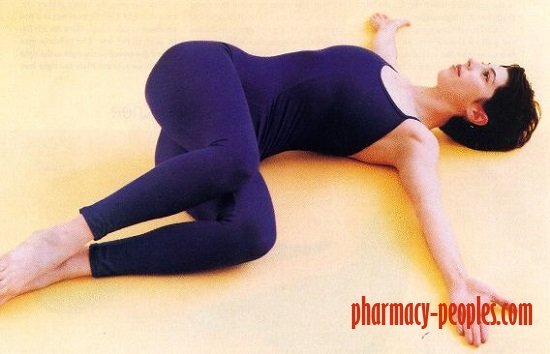
Instructions:
– Starting position – laying flat on your back, with spread arms until you form a “T.”
– Keeping shoulders on the ground, begin turning both knees on one side, to the middle and then to the other.
4. The Single Knee Twist
Instructions:
– Starting position – laying on your back with one leg extended straight, while another is bent in a 90° angle.
– Placing the opposite hand on the bent knee, turn face towards the resting arm, while shoulders need to remain on the floor
– Repeat on the opposite side
5. The Twisted Lunge
Instructions:
– Starting position – Step with one leg forward, bending it at the knee, while the other leg is behind you.
– Turning your back place opposite elbow on the outside of the bent knee, bringing palms together and locking posture for thirty seconds.
– Repeat on the opposite side
6. The Seated Twist
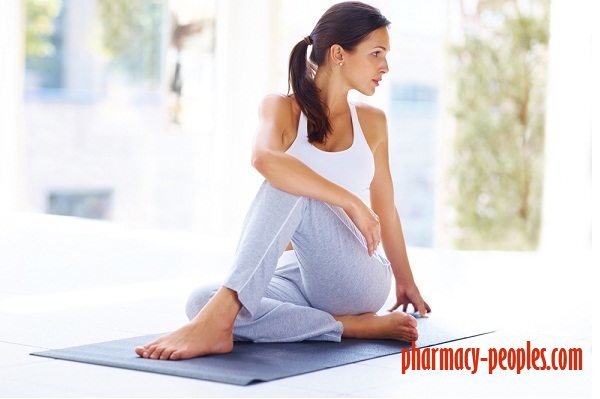
Instructions:
– Starting position – Sitting with your legs straight in front of you.
– Bend the leg at the knee and place the right leg on the outside of the other knee. Keep the leg straight or curl it up, whichever is comfier.
– Putting one hand flat on the floor behind you, place your opposite elbow on the outside of your bent knee.
– Turning to face behind you, keep your legs pointing forward.
7. The Cat-Cow Pose
Instructions:
– Starting position – on all fours (1)
– Breathing deep, lift the upper body by pulling your shoulders back. Stay in this position and take 10 breaths (ten seconds), (2)
– Then release and drop stomach to the air, until you form an arch. Hold this position for ten seconds and release.
– Returning to the starting position turn the head to the side
– Repeat for sixty-second.
8. Child’s Pose
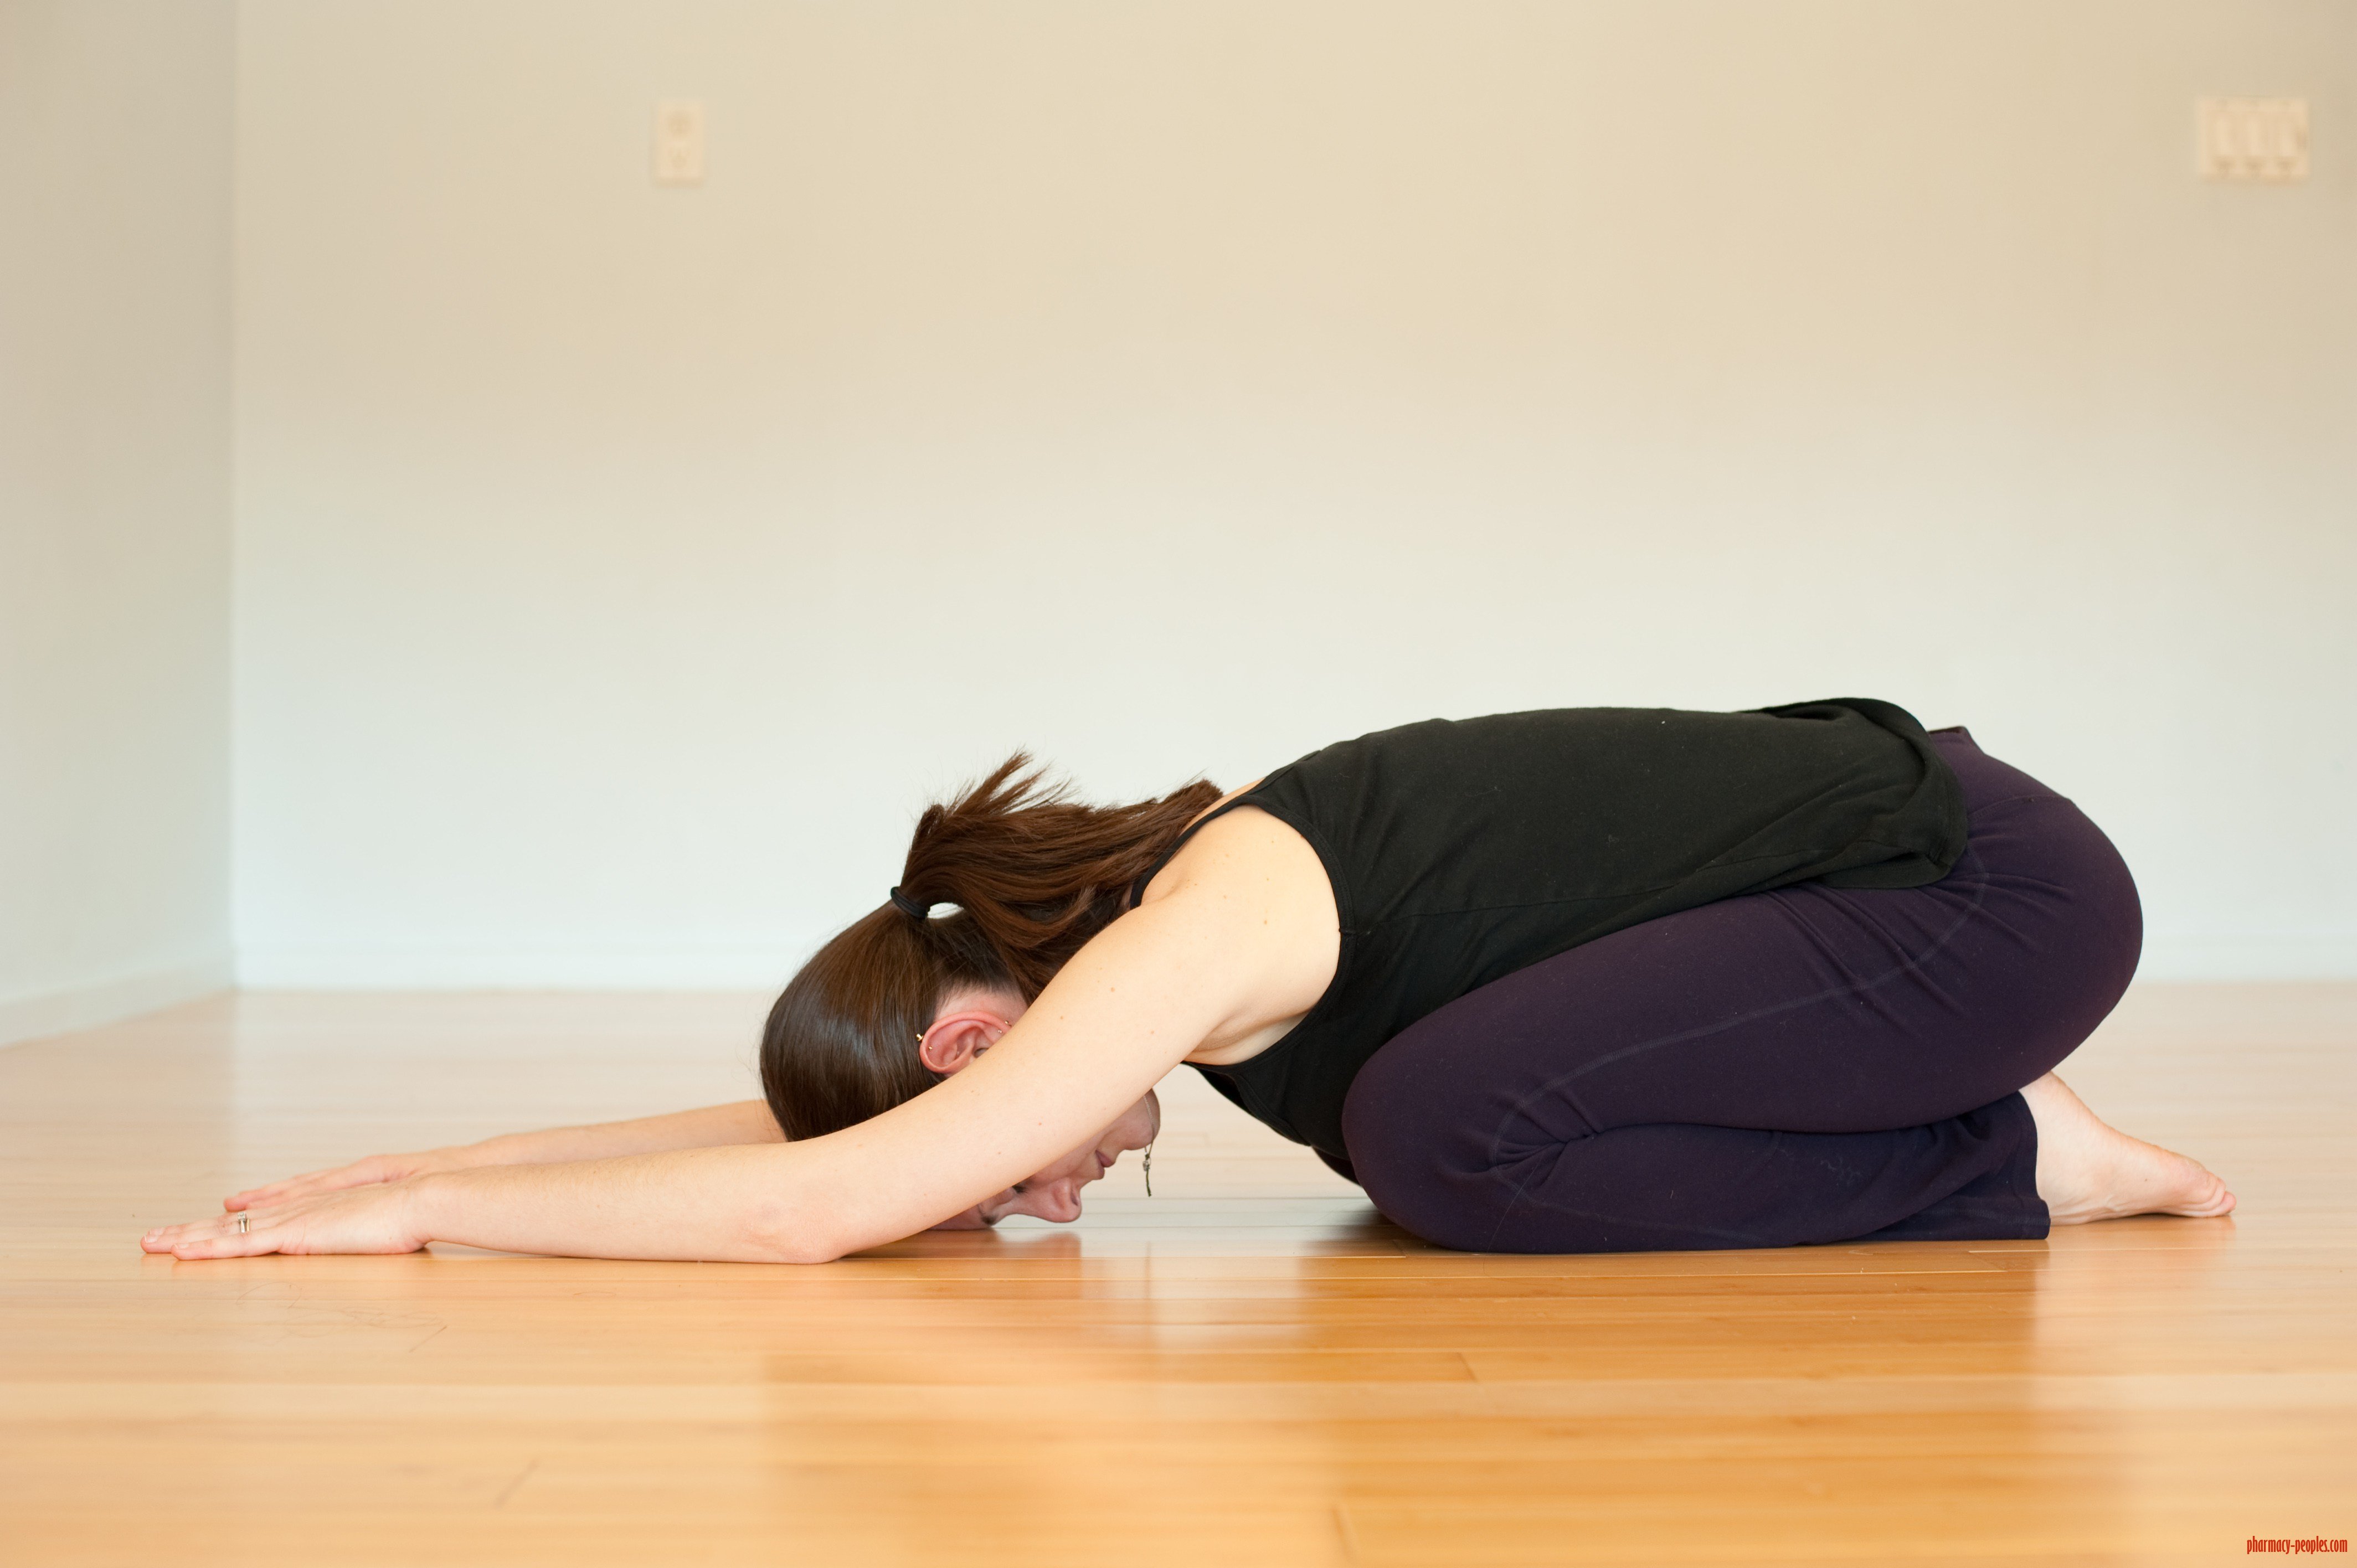
Instructions:
– Starting position – Kneeling position, with your hands laying in front of you.
– Hold the position for as long as you wish.
This pose can be practiced, just like the other ones, at any given time of the day.
- Health / Fitness
- 18-11-2017, 22:14
- 1 562
- Pharmatic